
In 2024, working with a chatbot assistant has become almost inevitable. When browsing the internet, it’s common to encounter a little robot popping up from the bottom right corner of the browser. Most chatbots today are capable of voice recognition and can answer questions in a human-like manner. AWS introduced its chatbot service, Lex, back in 2017 and has since released a new version called Amazon Lex v2 in 2021.
In this article, I will provide an overview of how to build more than just a simple “pizza ordering” mock chatbot. I will guide you on harnessing Lex’s power and transforming it into a digital assistant for Cloud Engineering tasks, such as creating an S3 Bucket based on different parameters.
In this guide
Lex Overview and Definitions | Prerequisites | Creating the Bot | Creating the Intent | Selecting the Appropriate Lambda Function | Testing the Bot | Summary | Unlock the Full Potential of Your AWS Infrastructure with Cloudvisor
Lex Overview and Definitions
Amazon Lex v2 offers advanced functionality and flexibility in natural language understanding and automatic speech recognition. With Lex, we can create various conversation flows. The main building block of Lex is a Bot, which is a collection of different Intents. A Bot can be connected to different messaging platforms, such as Slack or Microsoft Teams, and can have multiple versions and languages.
An Intent is a subcomponent of a Bot that focuses on a specific topic. To illustrate, let’s consider building an AWS Digital Assistant Bot, which may have multiple Intents. The first Intent we’ll create is the “creating an S3 Intent,” which is trained to understand the task of creating an S3 Bucket.
Within an Intent, we have Slots. Slots represent the values associated with the Intent. For example, if we tell the chatbot, “I would like to have a private S3 Bucket created, called ‘cloudvisor-bucket-9999‘,” the Slots would be “private,” which represents the desired property of the S3 Bucket, and the name of the bucket.
Prerequisites
To build the “creating an S3 Bucket” Intent, we’ll need a “cloud glue,” in other words, a Lambda function. In this guide, we will focus on creating the chatbot itself, and we won’t delve into the code of the function. However, you can copy and reuse the function if you wish to follow along with the guide.
# Python function Code - copy and paste if you would like to follow the guide => name it as Lex-Assistant

import boto3


def close(session_attributes, active_contexts, fulfillment_state, intent, message):
    response = {
        'sessionState': {
            'activeContexts':[{
                'name': 'intentContext',
                'contextAttributes': active_contexts,
                'timeToLive': {
                    'timeToLiveInSeconds': 5,
                    'turnsToLive': 1
                }
            }],
            'sessionAttributes': session_attributes,
            'dialogAction': {
                'type': 'Close',
            },
            'intent': intent,
        },
        'messages': [{'contentType': 'PlainText', 'content': message}]
    }

    return response


def creatingS3(intent_request):

    bucket_name = intent_request['interpretations'][0]["intent"]['slots']['BucketName']['value']['interpretedValue']
    bucket_privacy = intent_request['interpretations'][0]["intent"]['slots']['BucketPrivacy']['value']['interpretedValue']


    bloc_public_access = True if bucket_privacy == "private" else False

    s3_client = boto3.client("s3")
    s3_client.create_bucket(
        Bucket=bucket_name,
        CreateBucketConfiguration={'LocationConstraint': 'eu-central-1'}
    )

    s3_client.put_public_access_block(
        Bucket=bucket_name,
        PublicAccessBlockConfiguration={
            'BlockPublicAcls': bloc_public_access,
            'IgnorePublicAcls': bloc_public_access,
            'BlockPublicPolicy': bloc_public_access,
            'RestrictPublicBuckets': bloc_public_access
        },
    )

    session_attributes = intent_request['sessionState'].get("sessionAttributes") or {}
    intent = intent_request['sessionState']['intent']
    active_contexts = {}
    fulfillment_state = 'Fulfilled'
    message = 'S3 Bucket Successfully created'

    intent['confirmationState']="Confirmed"
    intent['state']="Fulfilled"

    return close(
        session_attributes,
        active_contexts,
        'Fulfilled',
        intent,
        message
    )


def dispatch(intent_request):
    """
    Called when the user specifies an intent for this bot.
    """
    print(intent_request)
    intent_name = intent_request['interpretations'][0]["intent"]['name']
    # Dispatch to your bot's intent handlers
    if intent_name == 'create-an-s3-bucket':
        return creatingS3(intent_request)
    raise Exception('Intent with name ' + intent_name + ' not supported')


""" --- Main handler --- """
def lambda_handler(event, context):
    return dispatch(event)
Creating the Bot
1. Log in to the AWS Console and navigate to AWS Lex. Ensure that you are using the latest version. If not, switch to the latest version.
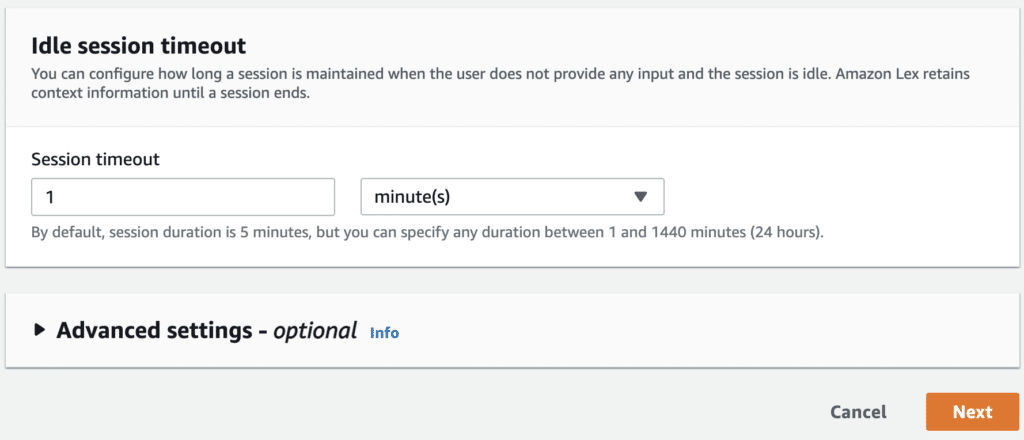
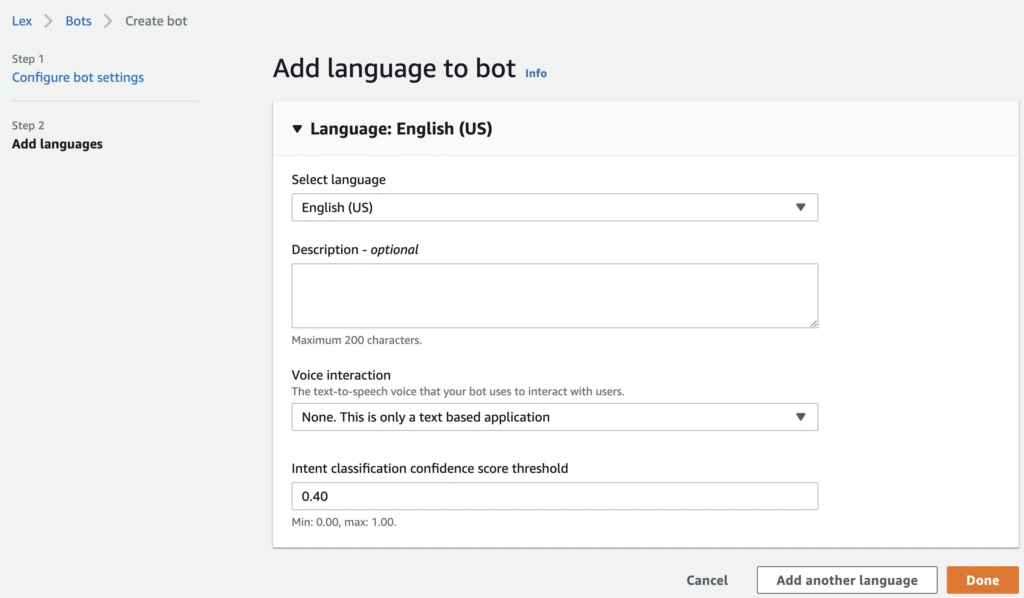
2. Create a new Bot and give it a name like “digital-assistant.” Select the option to create a role with basic Amazon Lex permissions. Set the session timeout to 1 minute and choose English as the language.
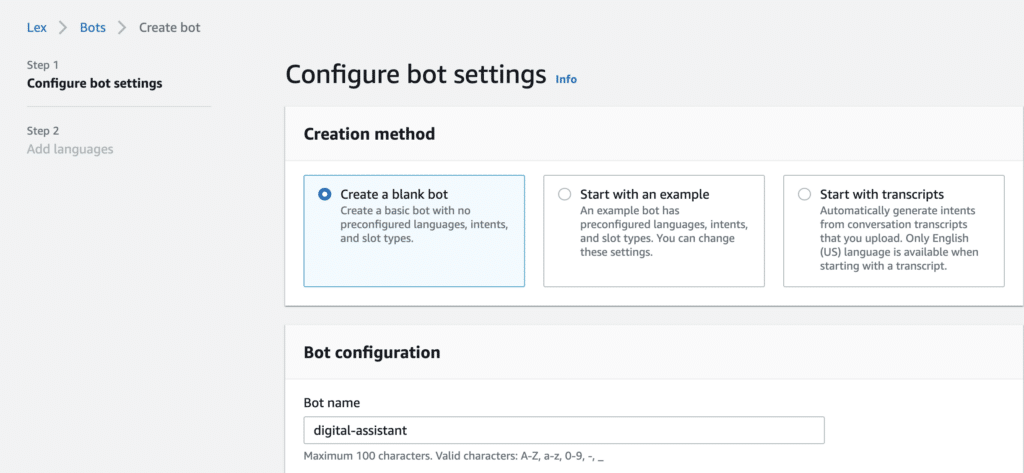

3. Click on the Done button!

Creating the Intent
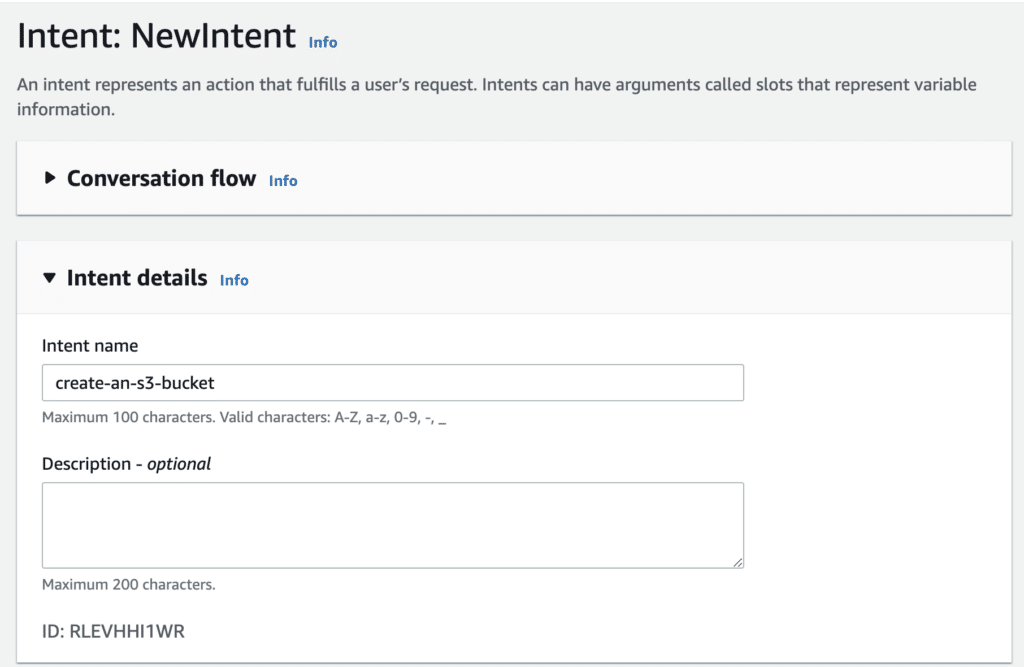
1. Click on the “Create a new intent” button.
2. Ensure that the intent name is create-an-s3-bucket (this is important because the Lambda function relies on this property).
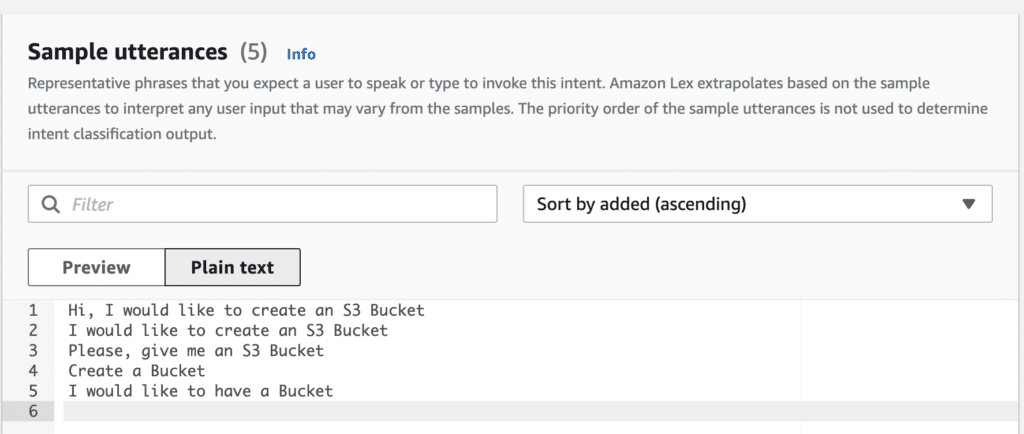
3. Create sample utterances that serve as the basis for training the model.
- The more examples you provide, the more accurate the results will be. These can be in the form of text-based questions.
4. Fill in the message section of the Initial Response Tab. Be creative with the content.

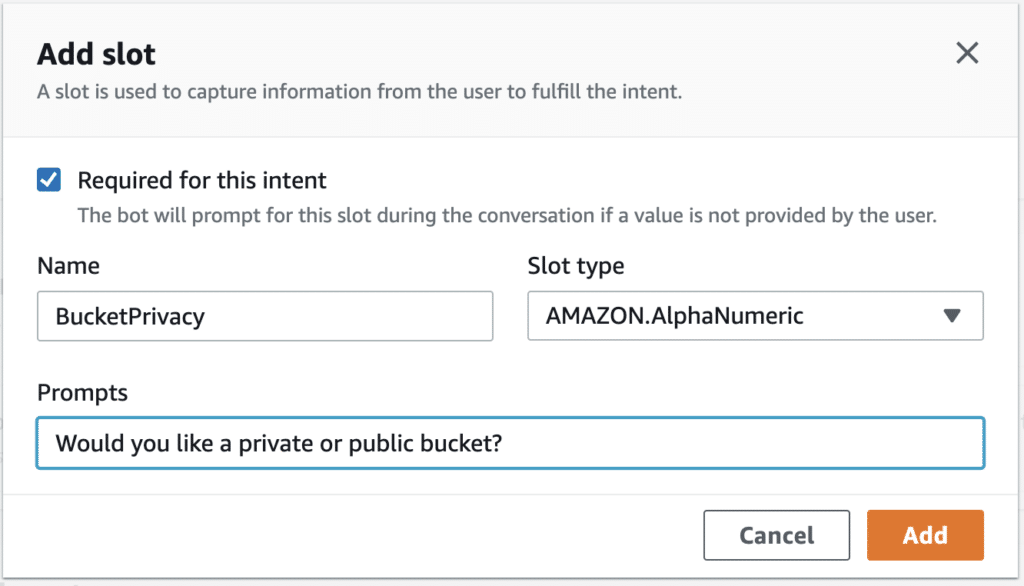
4. Now, it’s time to add Slots to the Intent. In this example, we will create a select option where the user will be prompted to choose between creating a public or private bucket.
- Add a slot with the following details:
- Name: BucketPrivacy
- Slot Type: Amazon.AlphaNumeric
- Provide a creative prompt for this slot.
- Once the slot has been created, you need to make some modifications. Go to the Slot settings and click on the advanced options.
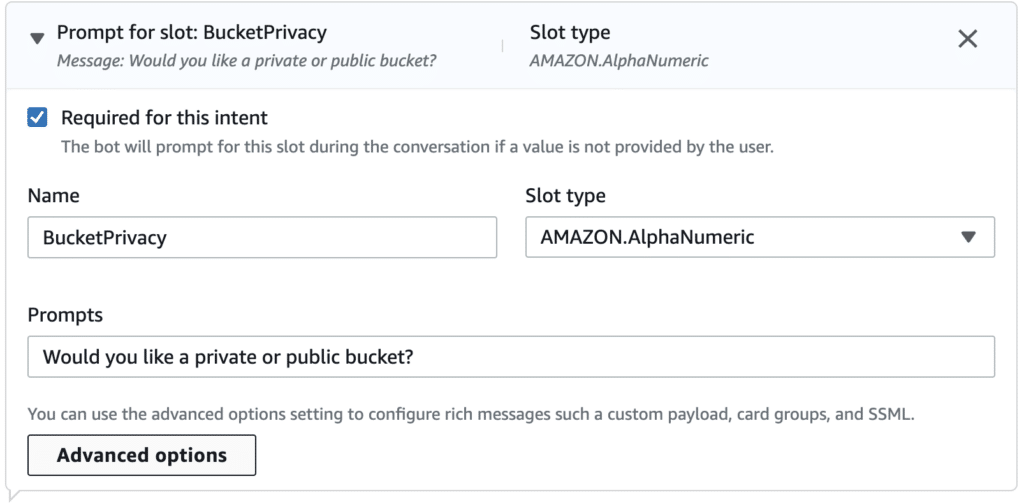
- In the advanced options, click on “More prompt options.”
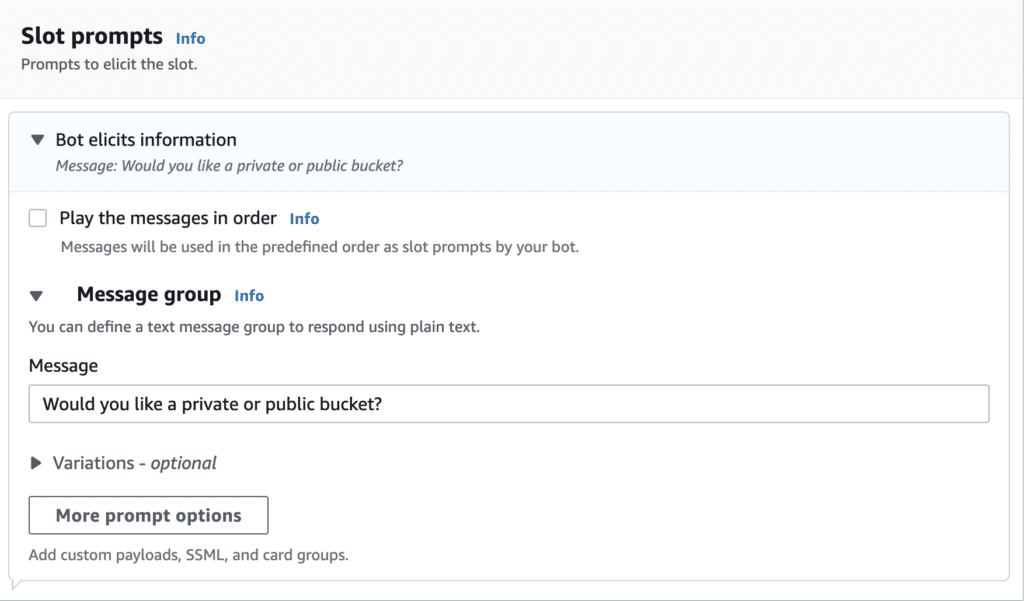
- Add a Card Group.
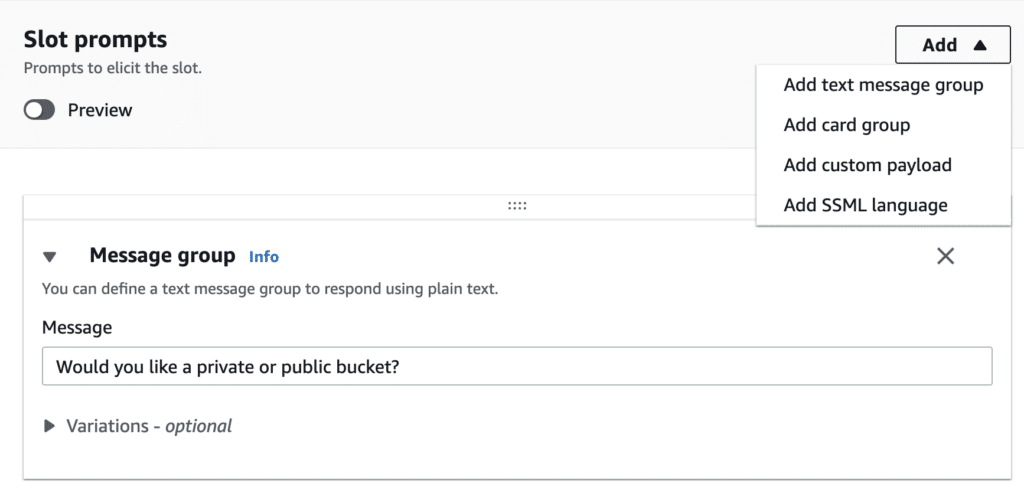
- Provide a title for the Card Group and fill in the buttons as shown below.

- Preview the changes, and you will see a beautifully rendered select option:

- Now, let’s create the second slot, which can be a traditional message.
- Add a slot with the following details:
- Name: BucketName
- Slot Type: Amazon.AlphaNumeric
- Provide a creative prompt for this slot.
- Add a slot with the following details:
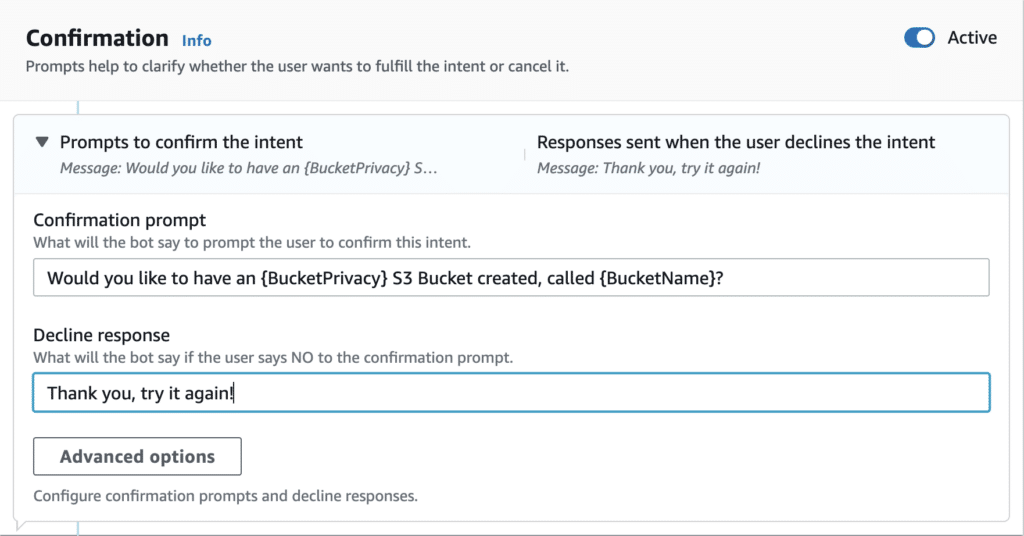
- Next, add the Confirmation Section of the Intent.
- See below for an example of how to reference the slot values: {BucketName} and {BucketPrivacy}
- Finally, let’s complete the Fulfillment section:
- Fill in the possible message section of the fulfillment for the Intent.
- Click on the Advanced options and enable the Use a Lambda function for fulfillment option.
- Interestingly, the selection of the actual Lambda function can be done in a separate interface.

- Lastly, the Intent should have a Closing Response.
- Feel free to be creative, as shown in the example below.

- Build the Bot.
- Look for the large “Build” button in the top right corner of the screen, and click on it. This process may take a few seconds to complete. (Remember to perform this step, as the Intent won’t work without it.)
Selecting the Appropriate Lambda Function
This section can be a bit tricky. It’s important to note that a single Bot can only be associated with one Lambda function using Lex V2. However, there are strategies to overcome this limitation.
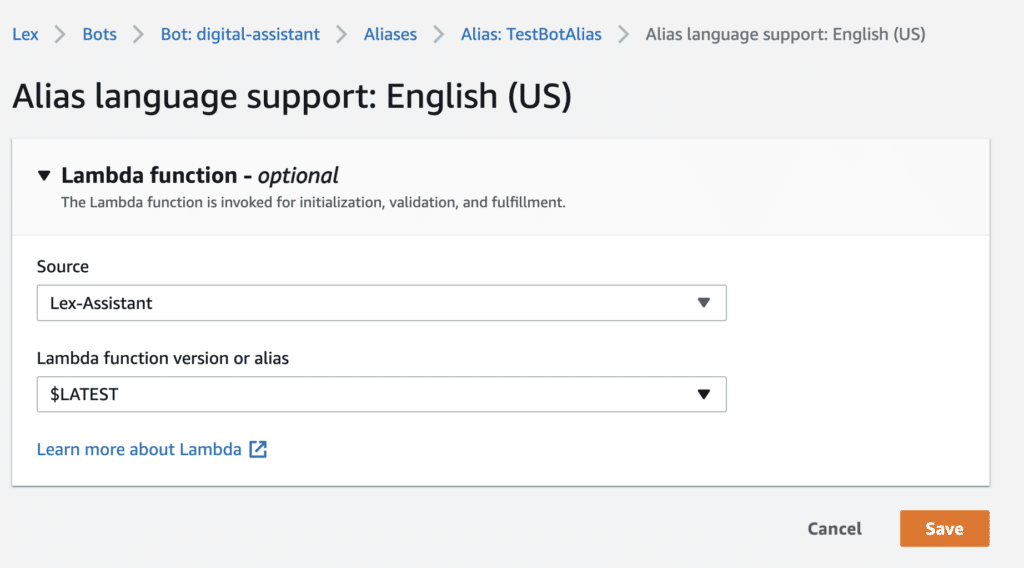
Every Bot has aliases, and by default, a single alias called TestBotAlias has been created. For now, we can work with this alias.
1. Click on the Alias.

2. Select the Language (English).

3. Now, you have the option to choose the Lambda Function associated with the Bot.
Testing the Bot
- Navigate back to the Intent that you created.
- Click on the prominent Test button located in the top right corner.
- Engage in a fruitful conversation with the Bot, as shown in the example below:

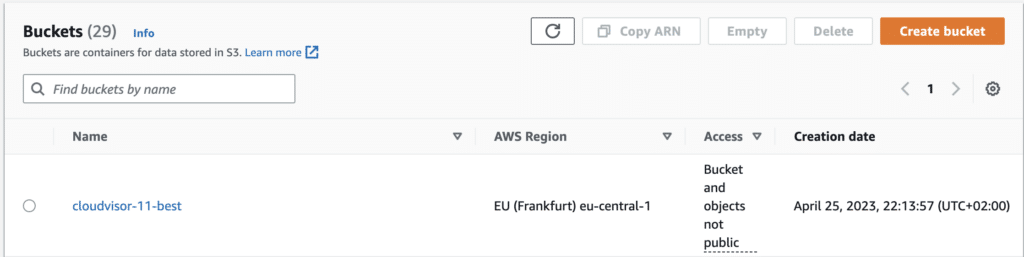
4. You will notice that the prompt will ask for the necessary details. Trust me, I have already created the Bucket for myself. See the example below:
Summary
In this guide, we have covered the basics of using Amazon Lex and explored the use of managed ML services provided by AWS. This approach offers the advantage of not needing to train ML models or set up complex ML pipelines. We have discussed different types of Slots, the use of a Lambda function for the fulfillment, and referencing slot values in the Confirmation message.
It is important to remember the hierarchy between the components in Lex. A Lex Bot serves as the main construct, which can contain multiple Intents. Each Intent can have multiple slots, and a single Lambda function can be assigned to an alias or preferred language of the Bot.
By following this guide, you have gained insights into utilizing Amazon Lex for building chatbot applications and leveraging its capabilities for natural language understanding and speech recognition.

Written by Sándor Bakos
AWS Cloud Engineer/Architect at Cloudvisor