Hosting Single Page Application using AWS CloudFront and AWS S3: User Guide


AWS partner dedicated to startups
- 2000+ Clients
- 5+ Years of Experience
- $10M+ saved on AWS
This is the second part of the mini-series covering the best way to host Single Page Applications (SPAs) or Static Websites using Static Site Generation (SSG) on AWS. The first part talked about AWS Amplify, this time we’ll focus on deploying a SPA using AWS CloudFront and AWS S3.
Table of Contents
Prerequisites
- To follow the steps in this guide, you will need to have the SPA or SSG build artifacts ready;
- Additionally, refer to the Hosting Single Page Application (using AWS Amplify) guide for instructions on how to get started with the
create-react-appframework.
Using AWS Console Guide
Step 01: Create an S3 Bucket
- Navigate to the AWS S3 Console;
- Click on “Create new Bucket”;
- Specify the following:
Bucket nameRegionBlock public access; this is currently the default;Encryption; AWS SSE S3 encryption is currently the default;
- Specify the following:
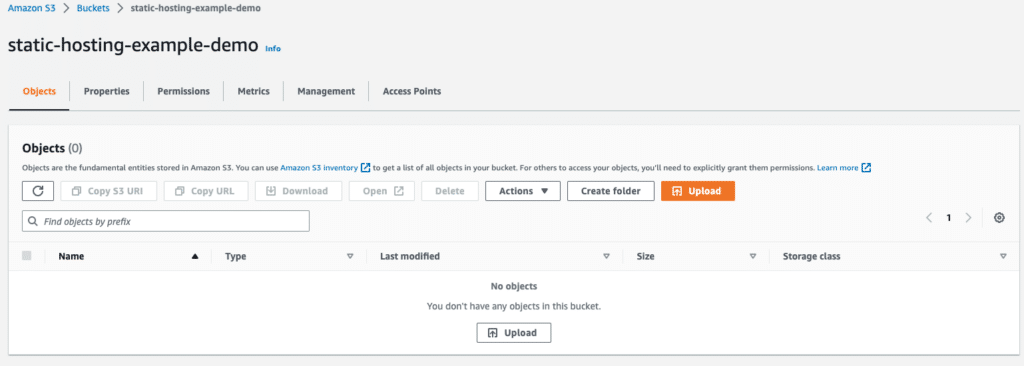
- After successfully creating the bucket, it will be empty.
Step 02: Upload the build artifacts
- Click on “Upload”;
- Grab the contents of the “build” folder and drag and drop them into the console;
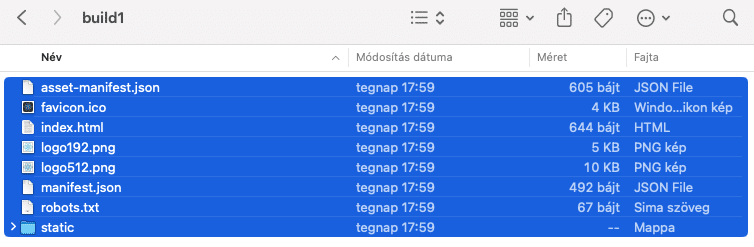
- You should see that the content is ready to be uploaded to the console (as shown below);
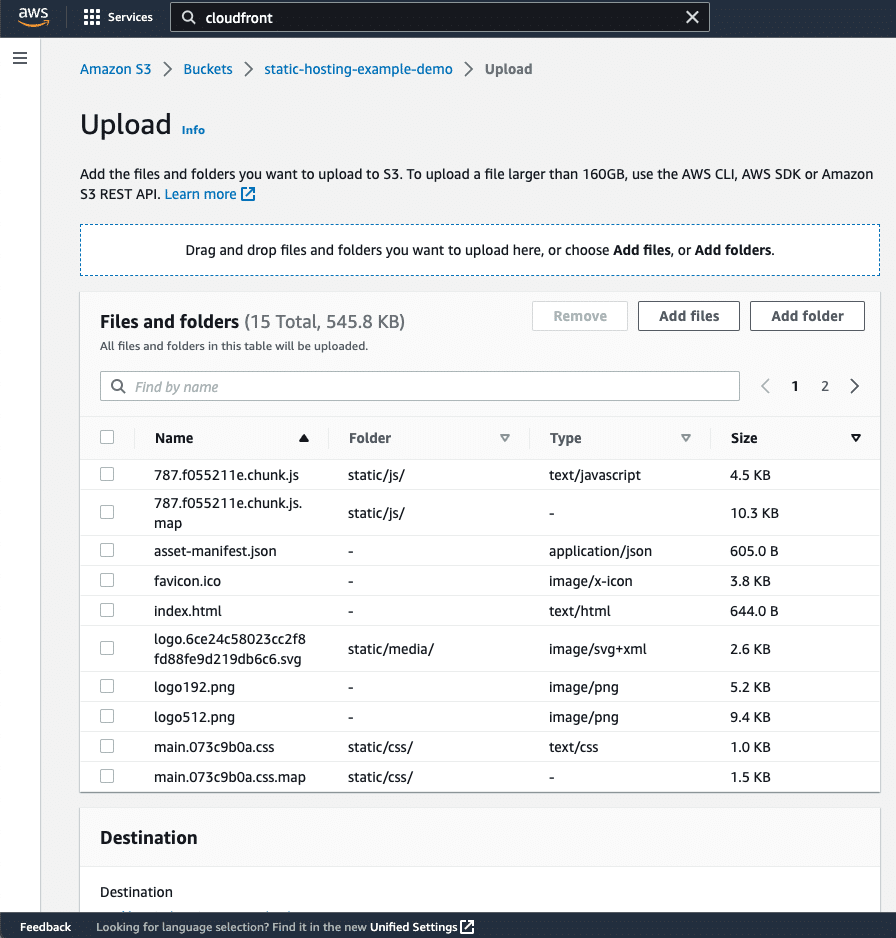
- Press the “Upload” button;
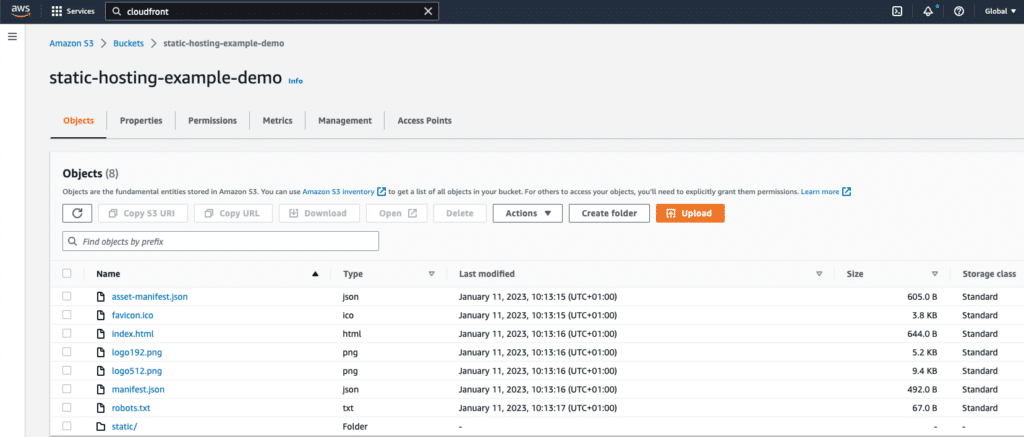
- Navigate back to the AWS S3 bucket and check the result.
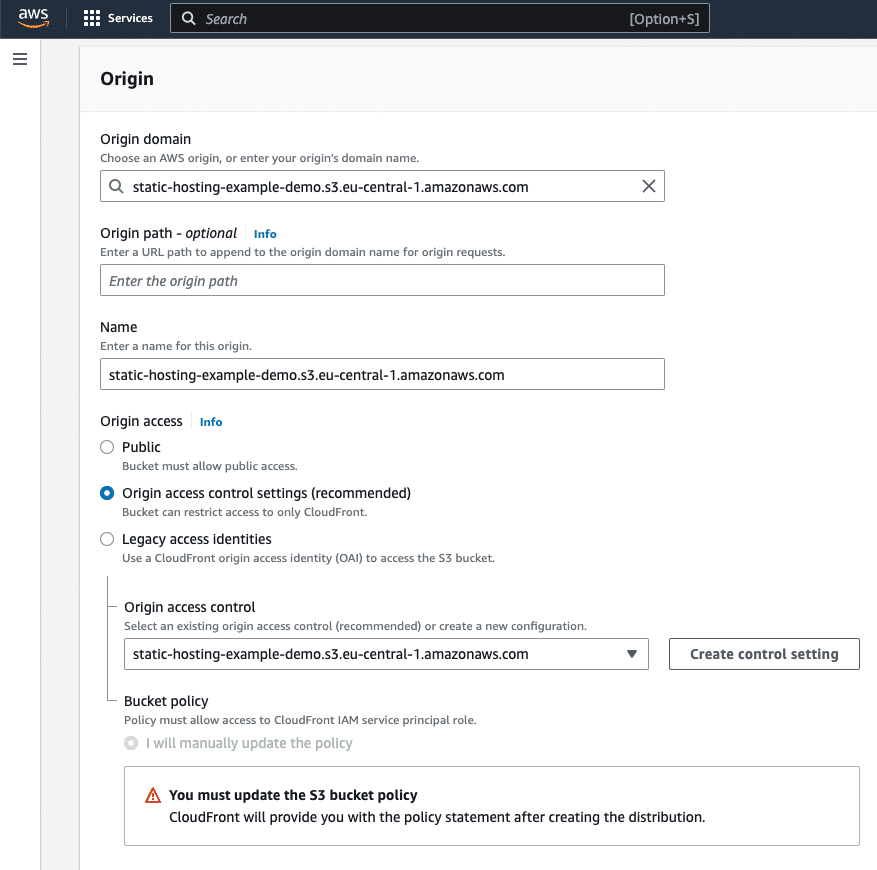
Step 03: Create an AWS CloudFront distribution:
- Navigate to the AWS CloudFront Console page;
- Click the
Create distributionbutton;- Specify the
Origin Domain;- Select the appropriate Amazon S3 bucket from the list (in our case,
static-hosting-example-demo.s3.eu-central-1.amazonaws.com);
- Select the appropriate Amazon S3 bucket from the list (in our case,
- Leave the
Origin Pathfield blank; - Leave the
Namefield as is (for us, it will bestatic-hosting-example-demo.s3.eu-central-1.amazonaws.com); - Select the
Origin access control settingsoption from theOrigin accessradio buttons;- Select the
cdnCDN Policy from theOrigin access controltab and click theCreate control settingsbutton.
- Select the
- Specify the
Step 04: Specify the Default cache behavior
- Keep the
Path patternas the default value(*); - Enable
Compress objects automaticallyby selectingyes; - Under the Viewer protocol policy, select
Redirect HTTP to HTTPS; - Allow only
GETandHEADHTTP methods by selecting them fromAllowed HTTP methods; - Under the
Cache key and origin requestssetting, selectCache policy and origin request policy;- Choose
Caching Optimizedas thecache policy;
- Choose
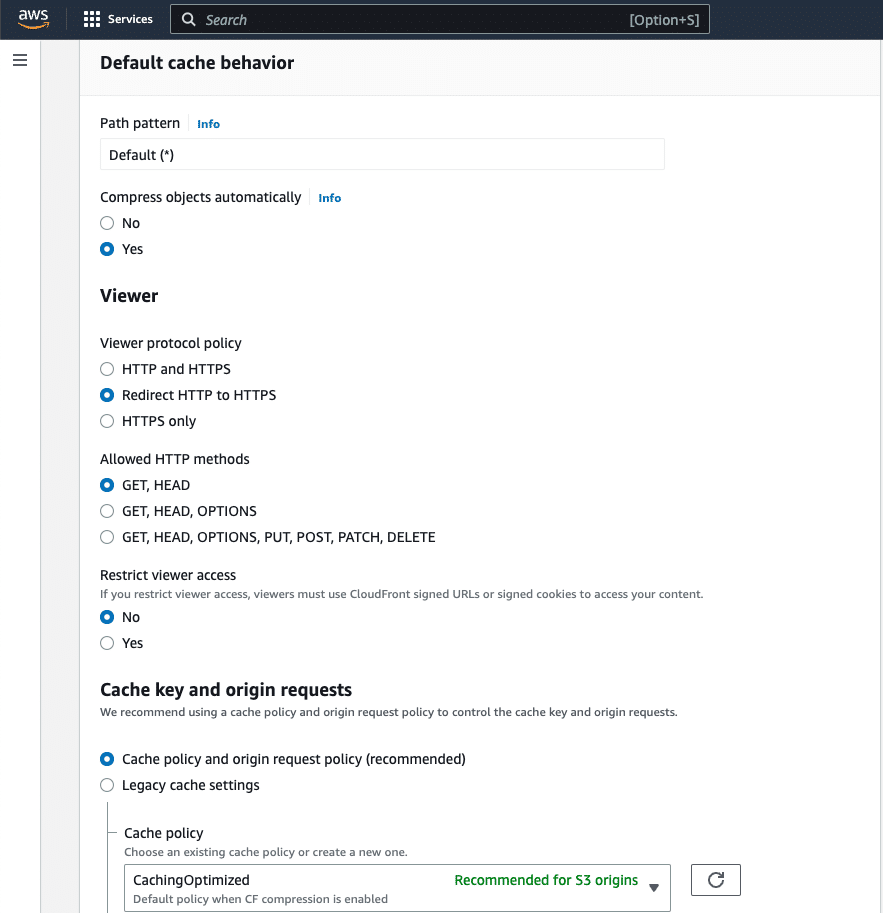
- Specify the
default root objectasindex.html; - Leave all of the other settings as they are;
- Click on the
Create Distributionbutton.
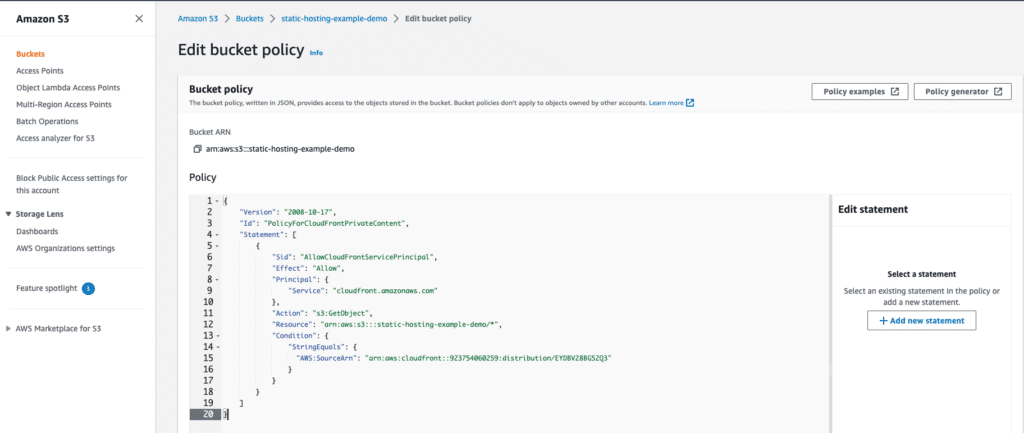
Step 05: Update the bucket policy of the AWS S3 Bucket
- Copy the bucket policy provided to you. After creating a distribution, a pop-up will appear in the console with the policy information;
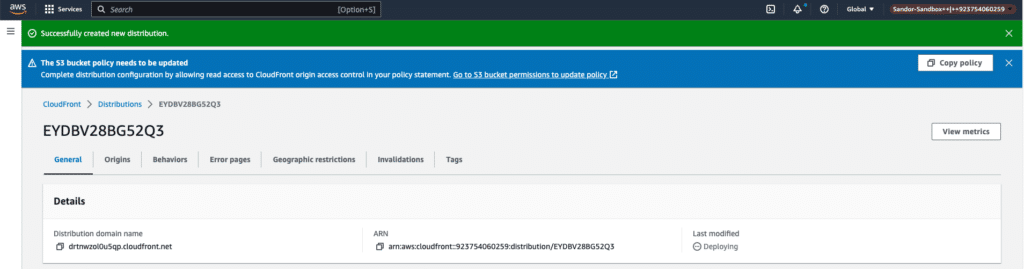
- Click on the provided link;
- Paste the content into the designated area;
- Click on the
Update policybutton;
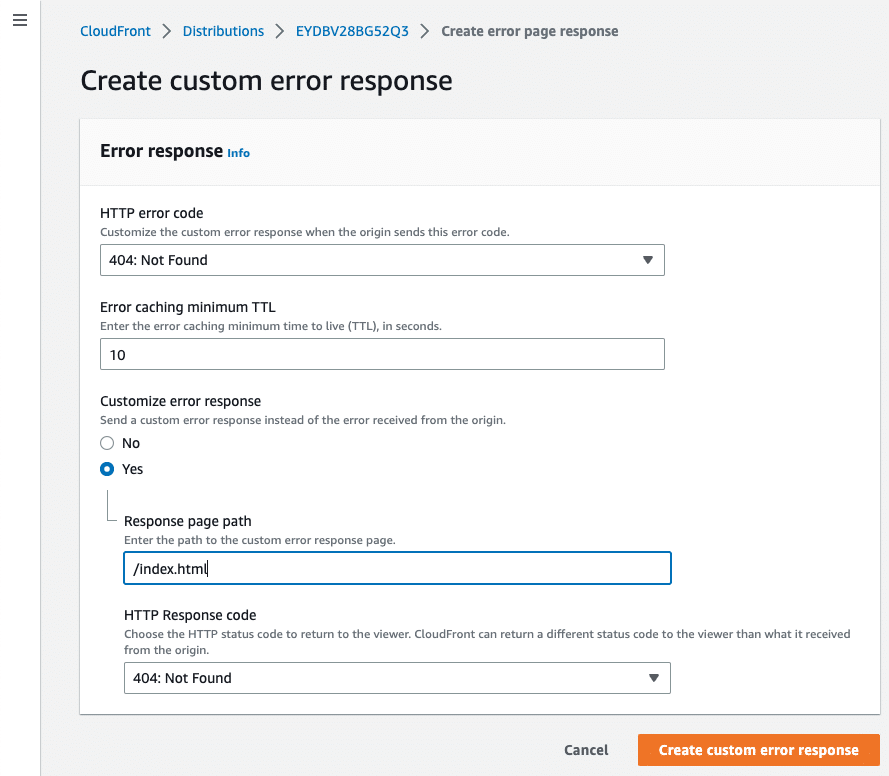
Step 06: Additionally, it is recommended to set up the Error pages
- For SPAs that use client-side routing, it is recommended to set up 404 and 403 errors and point them to
index.html; - For SSGs, generate different error pages such as
403.htmland404.html, and configure the errors accordingly;
Step 07: Wait for the distribution to update
- Updating different aspects of the AWS CloudFront distribution can take up to minutes.
Step 08: Visit the domain of the distribution
- You should see that the SPA/SSG application is running.
Using Terraform as Infrastructure as Code
Step 01: Prerequisites
- Install Terraform – https://developer.hashicorp.com/terraform/tutorials/aws-get-started/install-cli.
Step 02: Create a terraform directory at the root of the project
- Navigate to the terraform directory you just created.
mkdir terraform
cd terraform
Step 03: Create a Terraform provider file named provider.tf and set up the basics for the resources
# provider.tf
terraform {
	required_providers {
		aws = {
			source = "hashicorp/aws"
			version = "~> 4.16"
		}
	}
	required_version = ">= 1.2.0"
}

provider "aws" {
	region = "us-east-1"
}
Step 04: Create the AWS resources in the main.tf file
# main.tf
data "aws_caller_identity" "current" {}
# some locals specified will be reused later
locals {
  static_hosting_bucket = "static-hosting-bucket-1999" # change it for yourself
  s3_origin_id          = "CDN-Demo"
  account_id            = data.aws_caller_identity.current.account_id
}

# static hosting S3 Bucket
resource "aws_s3_bucket" "static_hosting" {
  bucket = local.static_hosting_bucket
}

# S3 Encryption
resource "aws_s3_bucket_server_side_encryption_configuration" "generic_encryption" {
  bucket = aws_s3_bucket.static_hosting.bucket
  rule {
    apply_server_side_encryption_by_default {
      sse_algorithm = "AES256"
    }
  }
}

# S3 Public Access Block
resource "aws_s3_bucket_public_access_block" "block_public_access" {
  bucket = aws_s3_bucket.static_hosting.id

  block_public_acls       = true
  block_public_policy     = true
  ignore_public_acls      = true
  restrict_public_buckets = true
}

# S3 Bucket Versioning
resource "aws_s3_bucket_versioning" "bucket_versioning" {
  bucket = aws_s3_bucket.static_hosting.id
  versioning_configuration {
    status = "Enabled"
  }
}

# CloudFront Origin Access Control
resource "aws_cloudfront_origin_access_control" "cdn_access_control" {
  name                              = "cdn-1"
  description                       = "CDN Policy"
  origin_access_control_origin_type = "s3"
  signing_behavior                  = "always"
  signing_protocol                  = "sigv4"
}

# CloudFront distribution
resource "aws_cloudfront_distribution" "cdn" {
  origin {
    domain_name              = aws_s3_bucket.static_hosting.bucket_domain_name
    origin_access_control_id = aws_cloudfront_origin_access_control.cdn_access_control.id
    origin_id                = local.s3_origin_id
  }

  enabled             = true
  is_ipv6_enabled     = true
  comment             = "GLOBAL CDN 1"
  default_root_object = "index.html"

  default_cache_behavior {
    allowed_methods  = ["GET", "HEAD"]
    cached_methods   = ["GET", "HEAD"]
    target_origin_id = local.s3_origin_id

    cache_policy_id        = "658327ea-f89d-4fab-a63d-7e88639e58f6" # THIS IS A BUILT IN
    viewer_protocol_policy = "redirect-to-https"
  }

  price_class = "PriceClass_All"

  viewer_certificate {
    cloudfront_default_certificate = true
  }

  restrictions {
    geo_restriction {
      restriction_type = "none"
      locations        = []
    }
  }

  custom_error_response {
    error_code    = 404
    response_code = 200
    response_page_path = "/index.html"
  }

  custom_error_response {
    error_code    = 403
    response_code = 200
    response_page_path = "/index.html"
  }
}

#
resource "aws_s3_bucket_policy" "cloudfront_access" {
  bucket = aws_s3_bucket.static_hosting.id
  policy = data.aws_iam_policy_document.cdn_policy.json
}

data "aws_iam_policy_document" "cdn_policy" {
  statement {
    principals {
      type        = "Service"
      identifiers = ["cloudfront.amazonaws.com"]
    }

    actions = [
      "s3:GetObject",
    ]

    resources = [
      aws_s3_bucket.static_hosting.arn,
      "${aws_s3_bucket.static_hosting.arn}/*",
    ]

    condition {
      test     = "ForAnyValue:StringEquals"
      variable = "AWS:SourceArn"
      values   = ["arn:aws:cloudfront::${local.account_id}:distribution/${aws_cloudfront_distribution.cdn.id}"]
    }
  }
}

# Output the domain name to use it later
output "cf_domain_name" {
  value       = aws_cloudfront_distribution.cdn.domain_name
  description = "Domain name"
}
Step 05: Deploy the resources
# Initialize the terraform
terraform init
# Plan
terraform plan# Deploy
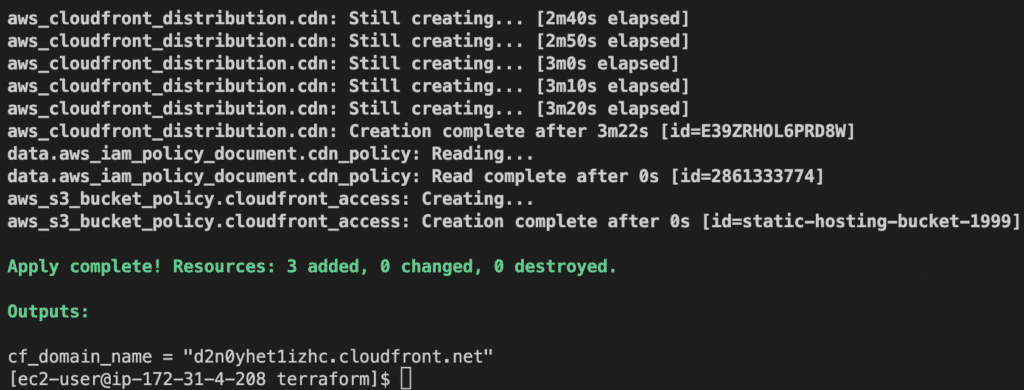
terraform applyStep 06: Wait for the result
- If the deployment is successful, you should see the output
cf_domain_namewritten to the console, as shown below:
Step 07: Copy the build files to S3
# navigate to the build folder
cd ../build

# use the AWS CLI to copy the files
aws s3 cp . s3://static-hosting-bucket-199 --recursive
# You should rename the bucket ofc
Step 08: Check the result
- Navigate to the domain name of the AWS CloudFront distribution that has been created. The
terraform applycommand should output the domain name.
Learn More About Using AWS CloudFront and AWS S3 With Cloudvisor
Creating a static hosting solution for SPA and SSG applications with AWS CloudFront and S3 is an easy and cost-effective option. This mini-series provides a step-by-step guide on how to use the AWS Console to create a static hosting solution. Additionally, the second part of the article shows how to use Terraform as Infrastructure as Code (IaC) to deploy these resources.
Struggling to find the right AWS resources for your workloads and optimal configurations for these resources? Switch to an AWS DevOps Support and Monitoring Service with Cloudvisor! When you subscribe to our Proactive Support Service, our engineers will recommend the latest AWS best practices for you to implement and administer monthly reviews to ensure your infrastructure complies with these best practices.

Written by Sándor Bakos
AWS Cloud Engineer/Architect at Cloudvisor